
Introduction
Embarking on the journey of crafting your own gun holster is a gratifying and cost-effective endeavor, especially for those keen on a hands-on approach to their firearm accessories. In a world dominated by mass-produced holsters, this DIY venture allows you to break free from the conventional and create a holster that seamlessly combines functionality with your unique style. Whether you lean towards the rugged resilience of Kydex or the timeless charm of imitation leather, this guide serves as your comprehensive companion, offering a roadmap to bring your personalized holster to life.
For enthusiasts seeking a more hands-on connection with their gear, the process of crafting a DIY gun holster transcends mere utility. It becomes a testament to ingenuity, a chance to blend form and function in a way that store-bought holsters rarely achieve. In the realm of DIY gun holsters, you’re not just fashioning a practical accessory; you’re sculpting a piece that resonates with your individuality. Throughout this guide, we’ll delve into the intricate details of creating both Kydex and imitation leather holsters, offering a wealth of insights gleaned from two distinct articles. So, whether you’re a seasoned craftsman or a novice eager to explore the world of DIY gun accessories, let’s dive into the art of crafting holsters that truly embody the spirit of “diy gun holster.”
Material Selection
For Kydex Holster
Selecting the appropriate material is crucial for crafting a durable and functional Kydex holster. Opt for .08″ Boltaron thermoplastic or Kydex, finding the right balance between thickness and workability. The spacer material, such as scrap wood or MDF, plays a vital role in achieving the desired tension during the molding process. Foam is essential for molding, ensuring a snug fit around the pistol, while heat-resistant gloves protect your hands during the heating and shaping stages. Tools like a utility knife, drill, heat gun, pencil, and a dedicated toaster oven complete the toolkit for crafting a Kydex holster.
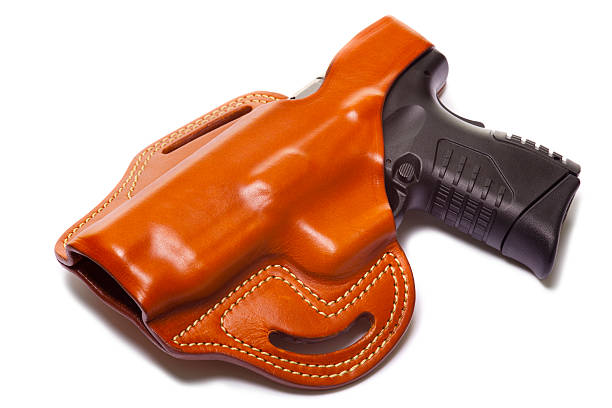
For Imitation Leather Holster
Imitation leather holsters offer a classic aesthetic with flexibility. Choose a quality imitation leather holster and, if not included, a toy gun that complements the design. Needle and heavy thread are essential for secure stitching, ensuring the longevity of your creation. Incorporating steampunk elements, such as long springs, a medium grandfather clock gear, jump rings, clothing snaps, and an optional long metal pin, adds a unique touch to the imitation leather holster.
Step-by-Step Instructions
For Kydex Holster
1. Cut the Plastic
The initial step in crafting a Kydex holster involves precise measurements and cutting of the chosen thermoplastic material, be it Boltaron or Kydex. Ensuring the plastic is cut to the exact size needed is crucial, as it sets the foundation for a holster that wraps around the pistol securely. A clean and accurate cut not only facilitates the molding process but also contributes to the overall aesthetics of the finished product.
2. Spacer
Introducing a spacer under the dustcover is a pivotal aspect of achieving the desired tension and customization in the holster. This spacer, typically made from scrap wood or MDF, influences the form and fit during the molding process. Adjusting the spacer allows crafters to tailor the holster precisely to their preferences, ensuring optimal functionality and comfort when the holster is in use.
3. Oven
Utilizing a dedicated toaster oven, preheated to approximately 250°F, is a critical step in preparing the Kydex for molding. The controlled heating process ensures that the thermoplastic becomes pliable without reaching a point of overcooking, maintaining its structural integrity. Consistency in the heating process is key to achieving a moldable texture that enables the Kydex to conform seamlessly to the contours of the pistol during molding.
4. Molding
Molding the heated Kydex around the pistol is where the DIY holster takes shape. Using layers of foam and a DIY press or a weighted 2×12, craftsmen press the plastic, forming it securely around the firearm. Precision and speed are imperative during this step, ensuring that the Kydex retains its shape and definition while accommodating the specific features of the pistol. This step demands a careful balance between efficiency and accuracy.
5. Trimming
Once the molding is complete, trimming excess plastic is a meticulous task to refine the holster’s shape. Craftsmen use a utility knife to carefully remove any surplus material, ensuring clean edges and a polished appearance. The trimming step is crucial for both aesthetics and functionality, as it contributes to the overall comfort and accessibility of the holster when drawing or holstering the firearm.
6. Belt Attachment
Crafting a recess for the belt attachment is a thoughtful addition to the Kydex holster. Whether integrated during the molding process or as a separate step, creating this feature involves using scraps as spacers. This ensures that the holster aligns seamlessly with a belt, providing a secure and comfortable attachment point. The attention to detail in this step enhances the holster’s versatility and suitability for various carrying preferences.
7. Spacers
The incorporation of spacers, particularly when used under the dustcover, adds an extra layer of customization to the finished product. Rubber fuel hose, chosen for its flexibility and rigidity, serves as an ideal spacer material. Ensuring a snug fit, these spacers contribute to the overall structural integrity of the holster, preventing unnecessary movement and ensuring a reliable and secure grip on the firearm.
8. Finishing Touches
The concluding steps involve adding refined details to the Kydex holster. Drilling precise holes for attachments, such as Chicago screws, enhances the holster’s functionality and adjustability. The use of wet 600 grit sandpaper for polishing the edges adds a professional and aesthetically pleasing finish. These finishing touches not only contribute to the holster’s visual appeal but also demonstrate a commitment to craftsmanship and attention to detail, resulting in a high-quality DIY product.
Crafting a Kydex holster involves a series of meticulous steps, from the initial cut to the finishing touches, each playing a vital role in creating a functional, customized, and visually appealing firearm accessory.
For Imitation Leather Holster
1. Springs Placement
When crafting an imitation leather holster, the placement of long springs is a pivotal step in achieving both functionality and a unique aesthetic. Lay out these springs evenly on the holster, strategically spacing them approximately a quarter-inch apart. The goal here is not only to enhance the visual appeal with a distinct striped pattern but also to provide a level of flexibility and responsiveness to the holster. Securing these springs with robust stitching ensures their integration into the holster’s structure, contributing to a design that seamlessly combines style and practicality.
2. Embellishments
Elevating the visual appeal of your imitation leather holster involves incorporating steampunk elements that add a touch of personality and uniqueness. Gears, jump rings, and clothing snaps serve as excellent embellishments. The gears, with their intricate designs, contribute to the steampunk aesthetic, while jump rings provide a versatile means of connecting various elements securely. Clothing snaps not only serve a functional purpose in securing the holster but also add a decorative element. The combination of these embellishments allows for a personalized touch, transforming the holster into a distinctive accessory that reflects your individual style.
3. Optional Features
For those seeking additional functionality, the inclusion of optional features such as a speed cut becomes a thoughtful consideration. Using a Dremel and cutoff wheel, crafters can create a strategically designed cut in the holster. This modification facilitates quick and efficient pistol retrieval, particularly valuable in scenarios where speed is essential. While the speed cut is optional, it adds a dynamic element to the holster’s design, catering to those who prioritize swift and seamless access to their firearm. Careful consideration of the depth and placement ensures that the speed cut enhances rather than compromises the holster’s overall functionality.
Crafting an imitation leather holster involves not only meeting practical needs but also embracing the opportunity for creative expression. The strategic placement of springs, the addition of steampunk embellishments, and the consideration of optional features collectively contribute to a holster that is not merely utilitarian but a true reflection of craftsmanship and individual style.
Conclusion
Embarking on the journey of crafting your own DIY gun holster, be it from the resilient Kydex or the classic imitation leather, transcends the realm of practicality. It metamorphoses into a canvas for self-expression, allowing you to intertwine form and function seamlessly. As you navigate the intricacies of the crafting process, consider it an artistic endeavor, where each cut, stitch, and embellishment reflects your unique touch.
The marriage of creativity and functionality within your holster is a testament to your craftsmanship and meticulous attention to detail. Beyond serving as a reliable companion for your firearm, your personalized holster becomes a tangible manifestation of your individuality. The choice of materials, the strategic placement of elements, and the optional features all contribute to a bespoke accessory tailored to your preferences.
In the spirit of shared creativity, don’t hesitate to share your crafted holsters within the crafting community. By doing so, you contribute to a collective pool of ideas, inspiring others to embark on their DIY journeys. The crafting community thrives on collaboration and innovation, and your holster can serve as both an inspiration and a conversation starter.
So, as you experiment with embellishments and refine your holster-making skills, relish the process. Let your personalized holster stand not only as a practical tool but also as a symbol of your ingenuity in the world of crafting. In the realm where function meets artistry, your DIY holster becomes a reflection of your unique approach to the age-old craft.
Frequently Asked Questions
Q1: Is crafting a DIY gun holster suitable for beginners, or is it more for experienced craftsmen?
A1: Crafting your own DIY gun holster is accessible to both beginners and experienced craftsmen. The comprehensive guide provided covers step-by-step instructions for both Kydex and imitation leather holsters, offering insights that cater to a range of skill levels. Novices can start with simpler designs, gradually progressing to more intricate projects as their skills develop.
Q2: What safety measures should I consider when working with Kydex and imitation leather materials?
A2: Safety is paramount during the crafting process. When working with Kydex, ensure proper ventilation as the material emits fumes when heated. Wear heat-resistant gloves to protect your hands. For imitation leather, use a well-ventilated workspace, and exercise caution when handling tools like needles and a Dremel. Always follow safety guidelines for the specific materials and tools you are using.
Q3: Can I personalize my DIY gun holster further with additional embellishments not mentioned in the guide?
A3: Absolutely! The guide provides a foundation, but the beauty of crafting your own holster lies in the opportunity for personalization. Feel free to experiment with additional embellishments, colors, or textures to make your holster truly unique. Just ensure that any additions do not compromise the holster’s functionality or safety.
Q4: Are there specific considerations for different pistol types when crafting a DIY holster?
A4: Yes, the guide acknowledges the importance of considering the specific features of your pistol during the crafting process. Whether molding Kydex or adding embellishments to imitation leather, the guide encourages crafters to be mindful of the pistol’s dimensions, sights, and ejection ports to ensure a secure and functional fit.
Q5: How can I engage with the crafting community and share my DIY holster creations?
A5: Engaging with the crafting community is encouraged! Share your crafted holsters on social media platforms, forums, or dedicated crafting communities. Use relevant hashtags to connect with fellow enthusiasts. The guide’s conclusion emphasizes the collaborative and inspiring nature of the crafting community, inviting you to contribute to the collective pool of ideas and discussions.